Until recently my home micro-bakery consisted of a standard oven with a baking stone and a large plastic bin for mixing dough (Fig. 1). My wife and I favored the technique of baking a wet dough at high temperatures (450F) on the baking stone with a cup or two of water in the oven to create steam. The high temperature produced a dark crunchy crust that we prefer, and the steam helped delay the setting of that crust so the little air pockets in the loaf could expand as they heated up.
 |
| Figure 1: Here you can see my lovely wife / lab technician mixing a batch of No-Knead dough in the old breadlab. High and low temperature incubators are visible in the background. |
Back in August we both had to move for work and ended up in separate tiny apartments. Her place has the tiniest kitchen ever discovered and my place didn't even have an oven. Obviously this was not an ideal situation for a variety of reasons, but I was not to be dissuaded. I still had a toaster oven, and even though the scale of my bakery would have to be downgraded from micro- to nano- I was determined to make it work.
Measuring & Mixing:
One recent improvement to my baking has been due to a switch from measuring by volume to measuring by mass with a small kitchen scale (Fig. 2). I tend to be pretty lax with measurements in the kitchen and often just eyeball things or add stuff until it feels right, but this doesn't always work with baking. It is surprising how much the density of certain flours can vary and that variation can really affect the outcome of a recipe. Especially those involving sourdough. I highly recommend measuring by mass if you have access to a scale. As far as mixing goes, this can change with certain recipes but I generally like to keep it simple. A wooden spoon works well, but there's nothing like getting in there with your hands to really get a feel for the characteristics of the dough you are building!
 |
| Figure 2: My kitchen scale. A vital tool in the breadlab... especially for care and feeding of the wild yeast. |
Proofing & Fermenting:
The dough from my go-to recipe in the Healthy Bread in 5 book just sit out for a few hours then lives in the fridge until needed. Some formulas need a little more attention though. To bulk ferment these I place a glass bowl with my newly mixed dough into my large plastic bin along with a couple mason jars of hot water. This does a surprisingly good job of maintaining a temp of >75F if you just switch out the water when things start to cool.
 |
| Figure 3: All you need to engineer your own proofing box is a large container or plastic cooler, a bowl and some hot water. |
After bulk fermentation and shaping I use a rattan banneton (a.k.a. brotform [Fig. 4]) or a colander with a smooth cotton towel liner. In either case coat generously with whole wheat flour to avoid sticking.
 |
| Figure 4: My banneton. Coat well with flour to avoid sticking and you will get a beautiful swirly pattern on your crust. |
Baking:
The oven I am using these days is a Euro-pro convection toaster oven (Fig. 5), and I have to say I am pretty amazed by what this little thing can do. The primary challenge with this tool was that there was no room for a steam tray and the crust would harden before the loaves had fully expanded resulting in weird splitting or an overly dense crumb.
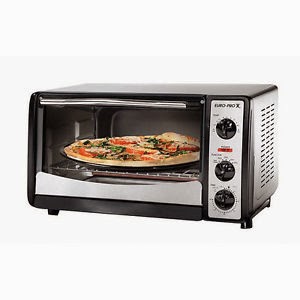 |
| Figure 5: The Euro-pro convection toaster oven. Tight quarters for a loaf of bread, but gets the job done nicely. I love this thing! |
This issue was overcome with the addition of a small 8" cast iron dutch
oven (Fig. 6). Baking in the dutch oven with the lid on traps the steam
that naturally emerges from the wet dough. This way the crust doesn't
harden until the loaf has fully expanded.
 |
| Figure 6: A small dutch oven does a great job of retaining heat and steam. Both vital elements of a well baked loaf! If you use one make sure to remove the knob on top or it may melt in the oven. |
Results:
Results will be addressed in the individual formulas. But here is a sample of what can be done with these simple tools and the right techniques.

Nice! Will be back often.
ReplyDeleteGreat! I'm glad you found me so soon. I look forward to hearing your thoughts on what I put up here.
DeleteWOW...I am ever so impressed Nick with your initiation of this blog! The article is so well written and user friendly. Never realized how much time, energy, talent and skill go into baking breads. The breads are so beautiful and delicious looking. My mouth is presently watering looking at your creations! Great job! Michelle appears to be the perfect fit in the "kitchen/bakeshop". My new year's resolution is to begin a sour dough starter! Thanks for sharing!
ReplyDeleteThanks Trudy! I'm so happy to hear that my little blog has inspired someone to start baking already! As a first loaf I'd suggest the Simple No-Knead Bread in the Favorite Formulas above. Good luck & if you ever need some sourdough starter I'd be happy to bring you a portion next time I am in town.
DeleteWill take your suggestion! Currently printing the recipe! I'll let you know how I make out! A bit of excitement in my life!
ReplyDelete