Pages

Sunday, March 15, 2015

HWGGCC

It is time for the Fifth Annual Harry W. Greene Grilled Cheese Challenge (HWGGCC)! This annual competition pits grads, post-docs, faculty and staff against each other in a battle of cheesiness, bad puns, and culinary delights. Last year our international cuisine entry of Brazilian pao de queijo with prosciutto failed to win the peoples choice award by a single vote, and it has been a bit of a sore spot ever since. This year we went back to basics to construct a classic grilled cheese with the best ingredients we could find and a couple unexpected flavors to spice things up. My main focus of course was the bread.

For this event I wanted a pan loaf that would hold up well to grilling & not get soggy when covered with melty cheese, but would also be more than just a vehicle for other toppings. I wanted it to stand alone as an ingredient, bring some real flavor to the sandwich & compliment the cheezy goodness inside. To find the right flavor combination my colleagues and I tested the spectrum of flavors from sweet and salty, to savory & spicy. Test loaves included multigrain-sourdough, walnut-raisin, sundried-tomato & rosemary, and apricot-gorgonzola. All of these cocktails resulted in pretty great bread, but was it the winning combination? The apricot- gorgonzola came close. It made a pretty amazing grilled blue-cheese sandwich, but we thought that might be a bit too far from the classics for the judges panel. So in the end we decided on one of my all time favorite foundations for a kick-ass grilled cheese: Jalapeno-Cheddar.

The idea for this bread comes from my friends at "All You Knead" bakery in Beacon, NY, who bake this incredible stuff on a regular basis. I didn't have their exact recipe (and I wont be posting a recipe here bc I wouldn't want to share their secrets with the whole internet) but do I think I was able to make a reasonable approximation in my home kitchen. I was especially happy with my jerry rigged steam oven technique, illustrated below.

 Scaled loaves (1300g - a bit too large) studded with sharp NY cheddar and spicy jalapenos

 Shaped loaves going into the steam pans

Topped with some more shredded cheese and awaiting the final rise

 
My oven within an oven. 
The trick for trapping steam when baking multiple (in this case 3) pan loaves.

 The final product. Look at those pockets of melted cheese!


Update 3/11/15:  The HWGGCC was today and we swept the top awards of peoples choice and first prize from the panel of judges! We could barely keep up with demand as we were grilling these up. There were some technical difficulties with power going out to our electric griddle, so some of them came out a bit more soggy than intended, but they were still pretty great.

For anyone interested in recreating this masterpiece at home:

On the inside of 2 slices of jalapeno cheddar bread

- shredded sharp cheddar & fontina cheese  (enough to cover the bread)
- spread the inside of one slice with about 1/2 tsp of dinosaur BBQ sauce
- about 1 tbsp of marinated pulled venison (I suppose pulled pork would be an acceptable substitute - or leave off for the vegetarian version)

On the outside:

- spread a very thin layer of ancho chile aioli (plain mayo will work in a pinch)
- sprinkle with a touch of shredded cheddar or pecorino

grill on a hot griddle until golden & toasty

Enjoy!


Thursday, October 9, 2014

Black Bread

Introduction

I have been really into my German rye bread (Vollkornbrot!) lately, but I have been wanting to try some different ryes for a while now. One variation that seems intriguing is black bread. Black bread is a rye based bread that is darkened with additional ingredients and with a long slow bake that caramelizes the sugars in the dough. Dark rye that you buy in the store is usually just regular rye with caramel coloring added to it. A whole foods approach with the same effect is to add molasses, cocoa, coffee, or a soaker of deeply toasted old bread. Black breads are common in the cuisine of eastern and northern Europe, and if you search online you can find Russian, German, and Finnish versions (just to name a few).

I have been eyeing a couple rather complicated looking recipes in Hamelman's Bread book for black bread & and Horst Bandel's Black Pumpernickel. I also wanted to try using dark beer malt to see how that would contribute to the color, so I tried this Lithuanian version as well.

Materials & Methods 

  • The recipes are long and complicated and in the book so I won't retype them here. Just a few notes on what I did differently (i.e. wrong). 
  • In general the old bread soaker that I made for the recipes in Hamelman's Bread was not toasted dark enough and was too wet. I strained off the liquid but I didn't really squeeze out the bread. I think that must be necessary because these doughs were way too wet.
  • The old bread soaker should also be ground up more than I did. You can see noticeable flecks of old bread in these loaves (they look like raisins in the photos below).
  • Also I was out of Bread Flour so I used All Purpose. Often that doesn't make a big difference but this time I think it did.
  • The water that I strained off of the old bread soaker was used to brew a couple batches of Kvass  (one with sugar and one with dark malt powder)


Lithuanian Black Bread
  • I pretty much followed the instructions. but I did add 50g of cracked malted barley from the homebrew store to see how it works in bread & how it might compliment the dark malt powder. 

Black Bread

  • I had to add about 10-15g of extra WW flour bc the dough was too wet to work with.


Black Pumpernickel
  • This was also too wet (not only bc of the wet soaker but bc I added an extra 170g of water by accident) so I added an additional 280g rye and 370g WW flour.
  • I could not find rye berries so I used wheat berries
  • I could not find rye chops so I used 10 grain hot cereal from Bob's red mill.
  • The recipe says you can fit 4lbs of dough into a loaf pan. This seemed to be too much for my pans - definitely use less next time.
  • I left this to rise too long while I was baking the other loaf. It seems like it might have gone flat on top. Next time pay closer attention to this.


Results 

Lithuanian Black Bread - This came out a solid brown color, but I wouldn't quite call it black. The dark barley malt and malted barley grains added a distinct sweet malty flavor (which I'm not sure I care for) but didn't make it all that dark. I suspect the recipe may have meant diastatic malt powder, which would have active enzymes that contribute to starch/sugar breakdown. I don't think these enzymes are present in beer malts. Next time try with DMP.


Black Bread - This one is a darker shade of brown approaching black. The flavor is very bold & robust with a strong presence of coffee. The coffee grounds that I used were Cafe Bustello esspresso, which is really dark, roasty and kind of bitter. I think something a little more mild would be more appropriate. I didn't add caraway seeds because I usually prefer the flavor of rye without them, but I think they would compliment the roasty coffee bitterness well here... maybe with a crust of caraway and rock salt on the top too.


HB's Black Pumpernickel - This one is dark enough to call 'black' in my opinion. I think it would have been better if I had ground up the old bread a bit better. And an egg wash to make the top glossy would look good too. This bread baked at a low temperature for a really long time & the smell was amazing as it aproached doneness. The flavor is great too. Very complex with a sour tang from the rye sourdough and lingering sweetness from the molasses.


Conclusion

All three were so different it is hard to compare directly. I think the Pumpernickel is my favorite but I have eaten more of the Black Bread (with sprinkled caraway seeds) so far. I have a couple more recipes to test in the links above, but I will probably return to some of these in the future.

Baguettes!


Introduction

I make baguettes every so often. And while they seem to get slightly better each time I do, the perfect baguette has been elusive. However, I really think I made some progress this week. I am staying with my brother Dave & his wife Heather at their place in the Hudson Valley for a little while. The other day Dave was telling me about an article he read in a recent issue of Cook's Illustrated on how to make authentic baguettes at home.  I looked at the recipe and it really didn't seem much different from what I have done in the past, so I wasn't expecting to learn anything I didn't already know. Until I read the full article and discovered an ingenious trick for trapping steam around the baking baguettes.

I have always gotten the best results baking in a covered container, like my cast iron dutch oven, which traps all of the steam coming out of the dough as it heats. The steam keeps the crust softer for longer, allowing the little air holes in the dough to grow to their full potential. Typically, if I bake anything that doesn't fit in a pot (i.e. baguettes & batards) I will keep a pan of hot water in the bottom of my oven to make steam. This often doesn't get very steamy though, and in the case of long thin shapes like baguettes, the crust sets too soon if there is not enough steam. The crust then acts as an exoskeleton preventing further growth of the air pockets in the baking loaf. The novel strategy in this article was to place a pair of long aluminum roasting pans over the loaves to trap the steam. These are those disposable silver things they sell at the grocery store. I bought a pair of giant size foil pasta pans to make a baguette cover, and 2 oven liners to bake on (since my sheet pan is too short for baguettes).


Materials & Methods 


whole-wheat flour*
all-purpose flour
salt
yeast
malt powder **
water
Mass
38g
425g
10g
3.33g
-
340g
Percentage
8%
92%
2.2%
0.7%
-
73%


* sift the whole wheat flour to remove the larger flecks of bran - they will interfere with gluten development

** I did not use malt powder here - the recipe calls for 1 tsp


Timeline:

Day


Day 2

Mix all ingredients in mixing bowl. Let rest for 30m to autolyse.

Stretch & fold every 30m for ~3h

Let rest overnight (should be able to go up to 72h refrigerated)

(See video for shaping techniques)

Pre-shape into letter fold rectangles - rest for ~20m

Final shaping - more rest for ~1h until almost double in size

Bake at 500F for 5m covered. Then for 15 more minutes uncovered. (I was using a nice convection oven this time with the fan on, but I still rotated the loaves half way through to ensure even coloration).

Results 

I was super happy with the way these came out! The crust was thin, crispy and a rich golden color - even without the malt powder. The crumb was creamy in color with little flecks of brown from the small bits of bran that remained in the whole wheat flour. And the texture was perfect, with a variety of different shapes and sizes to the air pockets. The flavor was light, sweet, and wheaty - very nice.


Conclusion

Such a simple solution to get a good rise from homemade baguettes. I will also use this for oblong loaves in the future (or anything I want to do more than one at a time of). I was very pleased with the hole structure of these loaves, and with all the practice I got forming these guys, my shaping technique is really coming along too. Now my next challenge is to get the slashing a little more consistent - and to eat all of these baguettes.


Saturday, October 4, 2014

Vollkornbrot - (aka German Rye)


Introduction

I was traveling in Europe this past spring, and while I was there I spent a week at Göttingen University in Germany for a workshop. Of the many wonderful things that I experienced, one unexpected surprise was the amazing bread that they have. Now this is entirely an unjustified bias on my part, but when I think about European bread I think French baguettes, Italian ciabatta, etc. and not so much about the incredible ryes & whole grain breads of Northern Europe. Thankfully my time in Germany has opened my eyes to these wonderful ryes.

In particular the style of bread that really stood out to me were these dense little bricks packed with whole grains, sunflower seeds, and other various good things. At first glance I didn't expect much of the thinly sliced bread on the hotel breakfast buffet, but the flavor was excellent and paired well with both sweet and savory. And if that weren't enough, the name for this type of bread is 'Volkornbrot', which literally means 'whole' (voll) - 'grain/seed' (korn) - 'bread' (brot), and is definitely my new favorite word.

In an effort to recreate what I experienced I have tested out a few different recipes and so far this is my favorite.


The Gänseliesel statue in the market square of Göttingen

 Vollkornbrot mit Sonnenblumenkernen

(this is an adaptation of the Vollkornbrot recipes in Hamelman's Bread)

Rye Flour
Cracked Grain Cereal*
Water
Sunflower Seeds**
Starter
Yeast
Salt
(Fruit***)
Mass
655g
290g
750g
115g
20g
5g
17g
(190g)
Percentage
69%
31%
79%
12%
2%
1%
2%
(20%)

  • * I usually use 7 grain hot cereal from Bob's Red Mill. I have also used a mix of whole rye & spelt berries that I chopped in the food processor after soaking. You could also use bulgur, polenta, etc.  
  • ** A mix of Flax, Sesame & whatever else you like can be used too
  • *** There is a recipe using Currants in Hamelman's bread. I have used stewed Apricots and that was great! You might want to reduce the amount of the seed mix by half if adding fruit.

Cracked multigrain mix soaking - I think this one was cracked wheat (bulger) & oats

Timeline:

Day 1


Day 2


Mix 375g rye flour, 375g water, and 20g starter. Let incubate at RT overnight.

In another container mix 290g Multigrain Chops, salt and 290g of water. Let soak overnight at RT.

In a large container mix the fermented rye, mutigrain soaker, and all of the remaining ingredients. Let rest for 20-30 min.

While that is resting oil/butter a loaf pan and dust liberally with rye flour. Roll the dough into a log and place in the loaf pan. Dust the top with more rye flour and let rise for 1-2h at RT, or overnight in the fridge.

Bake at 380F for 2h (w steam for the first 20min) until the internal temp is 200F.

Let cool completely before slicing.

The final dough

The finished product - looks very brick-ish but really is a nice texture

Results 

If you are used to strong gluteny wheat flour, working with dough like this will take some getting used to. The base dough is very wet and sticky. This is in part a necessary property of  good rye bread because the rye has so little gluten that the loaf is essentially held together by the starches instead of the proteins. According to Peter Stolz in the 'Handbook of Dough Fermentations', fermenting the rye flour like this is important because it inhibits the amylase enzymes that would otherwise break down the amylose starch that we need to keep the loaf together.

This stuff smells so good when it is finished baking it is really hard to resist slicing it until the next day. But you should, because it really comes together as it rests. The flavor will develop even more with time & because of the large proportion of fermented rye it will last for a long time (weeks in the fridge) and still taste great.


Conclusion

I have been and will continue to make this on a regular basis. Every time I do it seems to get better. Makes a great hearty yet simple breakfast. Also really good with cream cheese and country dijon mustard!

Appendix 

By this point I have tried a few other versions as well. The one above is my favorite for everyday eating & because it is actually a bit simpler to make than some of the others. I also highly recommend the Toasted Barley Pan-loaf and Rene's Rye from Tartine No3 (pictured below)

Toasted Barley for the Toasted Barley Bread - Smells incredilble!

Mixing the dough -
 this is from Rene's Rye in Tartine 3, the recipe above will be (slightly) less hydrated

The seed mix - Sunflower, Sesame & Flax in this case

Mixing the seeds with the dough - it was hard to believe that this would actually form a loaf, but amazingly it did.

Rene's Rye - From Tartine No3

Rene's Rye - From Tartine No3

Really Sour Sourdough


Background:

Sourdough can really be pretty fascinating. It certainly isn't a typical ingredient in the normal sense. It's kinda more like a pet in the way you need to feed it and care for it if you want it to be healthy and active. And if you really think about what is going on in there, it's basically a miniature ecosystem - with yeasts and beneficial bacteria as the foundation species that live off of the primary productivity of the grains that you feed them, and all sorts of potential invasive species like molds, and other bacteria that can move in if the habitat changes too much.

I was passing some time the other day searching random things in Google Scholar, as us nerdy science types like to do (...or maybe its just me?), and I found a bunch of interesting scientific papers on the ecology of sourdough. As an ecologist (and a bread lover), I was impressed by the diversity that is present in sourdough. In one study the researchers took 28 traditional varieties and used genetic methods to identify the species of lactic acid bacteria and yeasts that were present (ref). In these 28 cultures they found 11 different species yeasts and 17 lactic acid bacteria. On top of that, each culture was made up of multiple coexisting strains of yeast and bacteria. So these aren't just mono-cultures of clonally reproducing yeast and bacteria, but are truly microbial ecosystems with a diversity of both individuals and species.

The yeast and lactic acid bacteria in these mini-ecosystems are essentially a symbiosis, with the metabolic activity of each member producing the food and the environment that the other needs to thrive. Like all symbioses they become greater than the sum of their parts. By producing CO2, alcohols, and organic acids with antimicrobial activity, they create conditions that not only  keep out foreign invaders (ref), but improves the shelf life, nutritional qualities and flavor of the bread baked with it.

Fermenting flour with a sourdough culture increases the bio-availability of minerals and eliminates natural toxins found in whole grains (ref). So in a way the symbiotic nature of sourdough can be extended to us, the human consumers. This actually may be more true than we realize, as some of the lactic acid bacteria found in sourdough cultures may have originated in the digestive system of mammals (ref) meaning that we truly do have an evolutionary symbiotic relationship with certain components of the sourdough ecosystems!


Introduction

Since I have switched over to natural leavening with sourdough starter cultures I have made some really good loaves. I have been surprised however at how non-sour they are though. Some that sit and ferment extra long or overnight may have a mild tangy aftertaste, but generally this aspect is barely noticeable. But if I am going to call something a sourdough, I want to be able to make it nice and sour. I tried out a 36 hour french bread recipe and an extra tangy recipe, but both were still quite mild. So then I had and idea - instead of manipulating the fermentation time - why not adjust the amount of fermented flour used in the first place?

I had a container of spent starter at 100% hydration that was accumulating in the fridge & I figured I could just incorporate that into the amount for flour and water used in a standard recipe.

Materials & Methods 

* this might be a bit off since I waited a while before I wrote down what I did, but I think this is pretty accurate.

Bread Flour
AP Flour
Whole Wheat Flour
Spent Starter (100%)
Active Starter (100%)
Salt
Mass
200g
75g
50g
900g
100g
18g
Percentage
62%*
15%
23%
277%
31%
6%

  • The dry mass %  only includes the dry flours and none of the flour in the starters. If those are considered this is about 60% hydration... despite the fact that no water is added. All of the hydration comes from the 100% hydration starters.
  • About 60% of the flour included in this recipe is pre-fermented in the spent & active starters.
  • You don't really knead this. Just fold periodically during fermentation.


Timeline:

1:30p

2p


5p


8p
Mix flour, water, and starters. Let rest for 30m to autolyse.

Transfer to an oiled bowl for fermentation and Incorporate the salt by stretching and folding.

Ferment at >75F for 3-4 hours, folding every occasionally

Divide into 2 loaf sized portions
Place in floured banneton and proof at >75F for 3-4h

Bake at 450F for 25-30m in a covered dutch oven
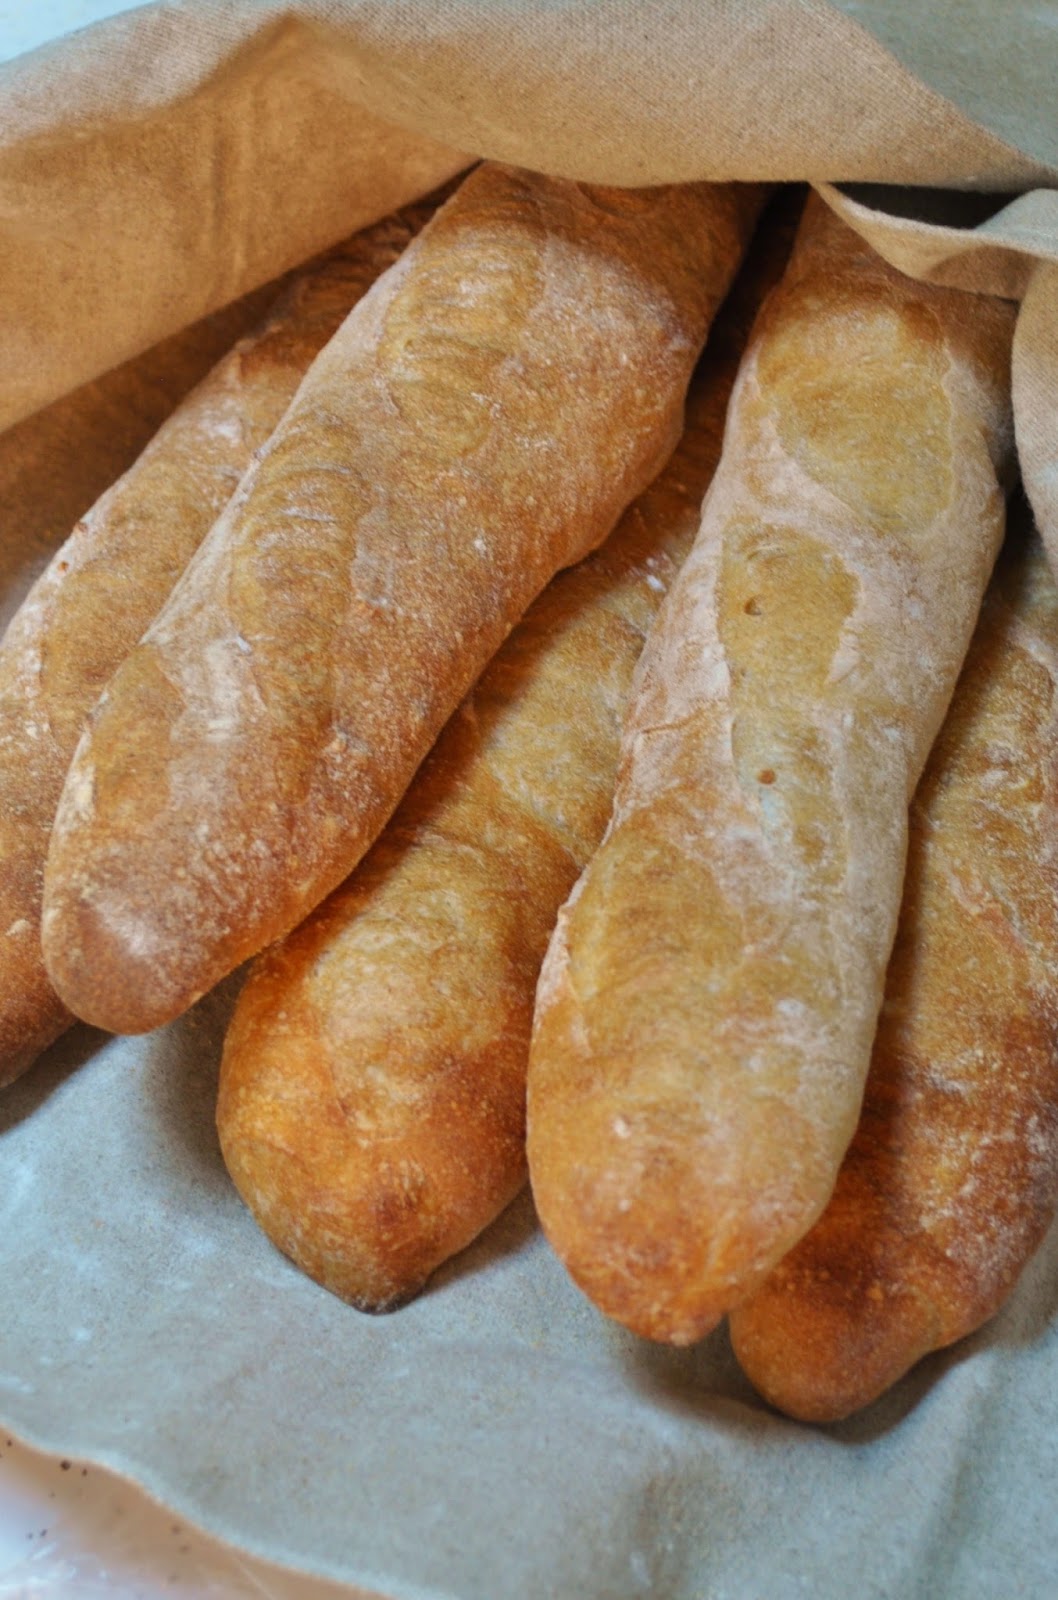
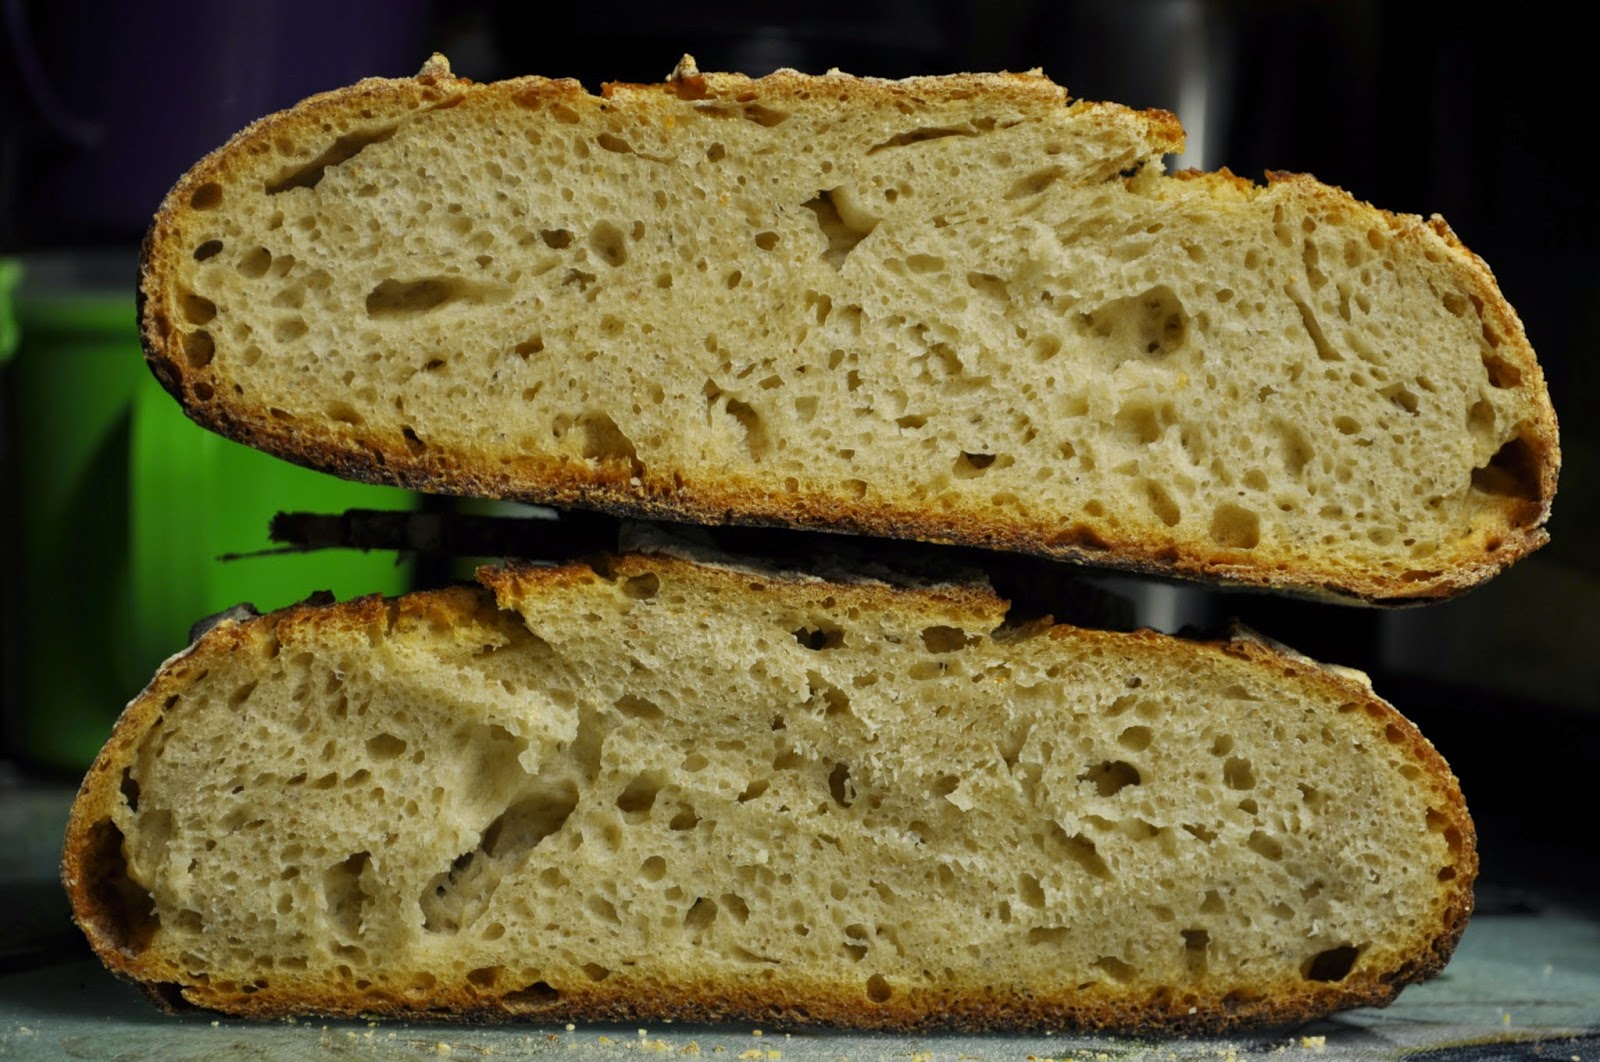


Results 

This turned out to be a fairly nice crackly loaf. The crumb was a bit on the dense side but had some decent holes, and there was a fairly thick crust but not too bad. The sour flavor definitely came through, and seemed to develop more with time a couple days after the bake. The second loaf (below) flattened out a bit. This is probably because the proteins in all that pre-fermented flour weren't able to hold the structure as well as fresh flour would.


Conclusion

I think this method of using a larger amount of pre-fermented flour is a good way to get the sourdough flavor to be more distinct. The use of old spent starter works acceptably well and is a nice way of using what you accumulate. Still, I think mixing up a large volume of fresh starter would probably be better for leavening power.

I read recently that even subtle details like the % hydration that you keep the starter at can affect the type of flavors that come through in your bread (ref). Wet starters like mine (100%) apparently promote lactic acid producing microbes, while dryer cultures (50-60%) promote acetic acid production. It seems like the cheesy/yogurty flavors associated with lactic acid are preferable for brioche & pastries, and more acetic acid might be better for more savory loaves. Perhaps I will play around with that in the future.

Sunday, April 13, 2014

Spring Farmers Market


In a true sign that spring is finally here, this Thursday was the first Cornell farmers market, a weekly marketplace that brings fresh meats, produce, and other items right to the heart of the Cornell campus. This student coordinated event runs through the spring & fall semesters and provides a great opportunity for students and the rest of the campus community to experience the wealth of fresh and local items that central NY has to offer.

It was at this farmer's market that I first learned of the Cornell Bread Club, a collective of student baking enthusiasts who prepare a variety of fresh baked items for campus events and to sell at the weekly market. Sometime last fall semester I wandered over to the market to pick up a few tomatoes and spotted their table. The club's head baker, Abby, had baked up some amazing sourdough that changed my whole outlook on homemade sourdough. Her bread had great flavor and texture, and had risen into beautifully formed loaves. It really inspired me to up my game with naturally leavened bread.

From that point on I became much more attentive to the care and feeding of my culture, and have improved the quality of my sourdough immensely. So much in fact, that I decided to contribute a few loaves to the market myself. I made 3 big loaves of whole wheat sourdough and a couple experimental loaves of German style whole grain bread. And I'm happy to say they all sold out, along with a bunch of other delicious loaves contributed by other bakers including, apple, cranberry-walnut, cinnamon swirl!


Whole Wheat Sourdough 

(adapted from Chad Robertson's White-Wheat Blend in Tartine No.3)

B Flour
WW Flour
WWW Flour
Wheat Germ
Water
Starter
Salt
Mass
350g
500g
150g
70g
850g
150g
20g
Percentage
35%
50%
15%
7%
85%
15%
2%

  • Mix all of the ingredients and autolyse for 30min
  • Fold once an hour for about 3-4 hrs. Then leave in the fridge overnight
  • Scale out dough into 1000g loaves and let rest in a banneton for 1-2 hours
  • Bake at 450 in a covered dutch oven for 45min until internal temp is 200F

Results 

I got some really nice looking loaves from the whole wheat sourdough. The German-style barley & spelt loaf came out pretty cool too... I'll do another post on those loaves soon.


Conclusion

I was really happy with how these came out, and glad to see that other people seemed to like them too! It was fun scaling up my baking volume and selling a few loaves. Looking forward to next week's market.... I'm thinking something Easter themed!

Tuesday, February 18, 2014

30% Einkorn Bread


Introduction

I was given Tartine Bread book No. 3 by Chad Robertson as an early birthday present last week (thanks Michael & Martha!) and I finally got a chance to use it this weekend. After the heirloom grain tasting event a few weeks ago I have been wanting to try some different wheat varieties so I picked up some Einkorn flour at the local co-op. Fortunately this book has a recipe for a loaf that uses 30% Einkorn flour so I started with that.

Einkorn (a.k.a. Triticum monococcum) is one of the earliest forms of wheat and a close descendant of wheat's wild ancestor Triticum boeoticum. It originated nearly 10,000 years ago in the fertile crescent, right at the dawn of the agricultural revolution, and has remained relatively unchanged ever since. Unlike modern hybrid wheat varieties, Einkorn (German for one seed) produces only one grain per spikelet. This of course limits crop yield and explains why it is a rather obscure crop despite excellent nutrition and flavor (ref).

This was my first attempt at using einkorn flour & I expected that the dough made with it would be kinds of slack and weak due to the low amount of gluten in this grain. I recruited my sister in law Sophia to help with the 3+ hours of stretching & folding (...while I went out for a beer), and she did a stellar job. I returned to find that she had made a nicely developed, cohesive ball of dough from the shaggy mess of flour and water I left her with... well done Sophia!

Materials & Methods 

We actually followed the directions from the recipe this time (mostly) so I won't reprint it here. The only (slight) modifications were: 
  • We used straight whole wheat flour with the bran, instead of high extraction flour
  • We left it in the cold overnight for bulk fermentation

Timeline:

7p

7:30p


10a


1p
Mix flours, water, and starter. Let rest for 30m to autolyse.

Incorporate the salt dissolved in 50g of water by stretch and folding.
Ferment at for 3-4 hours, folding every 30m

Divide into 2 loaf sized portions
Place in floured banneton and proof at RT for 3-4h

Bake at 500F for 20m in a covered dutch oven, then 450 for 20 min and a final 10 min uncovered


Results 

This dough was super wet (75% hydration) but the dough did not stick to the banneton and was surprisingly easy to work with after the first several stretch & folds. This recipe made two loaves. Both loaves rose nicely and sprung more than I expected in the oven. The crust color was a lovely reddish gold brown that made an amazing contrast with the  swirl of flour left behind from the banetton. The aroma of this bread was noticeably different than white or whole wheat. The flavor had a honey like, grassy sweetness that was really good. The weak point in my opinion was the texture that was a bit too soft which made it difficult to slice, even with a serrated bread knife. The warm creamy golden crumb had a nice complex hole structure with some nice large holes randomly mixed among smaller ones.


Conclusion

This is an incredibly beautiful and unique tasting loaf. The only problem was that it was a little too soft for me. Perhaps next time I will try it with more bread flour or some additional vital wheat gluten.